How to do budding plants
Budding is a grafting technique in which a single bud from the desired scion is used rather than an entire scion containing many buds. Most budding is done just before or during the growing season. However some species may be budded during the winter while they are dormant.
Budding requires the same precautions as grafting. Be sure that the scion and rootstock are compatible, that the scion has mature buds, and that the cambia of the scion and rootstock match. Be especially careful to prevent drying or contamination of grafting materials. With practice, the speed with which the process can be performed and the percentage of successful grafts those that “take” – should equal or surpass those of other grafting techniques used on the same species. Generally, deciduous fruit and shade trees are well suited to budding.
Preparing the Rootstock
Rootstock can be grown in the field where it will be budded, or dormant liners can be transplanted into the field and then allowed to grow under moderate fertility until they reach the desired 3/16- to 7/16-inch caliper. Since budding is generally done less than 4 inches above the soil surface, leaves and side branches must be removed from this portion of the rootstock to create a clean, smooth working area. To avoid quickly dulling the knife, remove any soil from the rootstock where the cut will be made just before actual budding takes place. The stem can be cleaned by brushing or rubbing it gently by hand or with a piece of soft cloth.
Preparing the Budwood
Collect scion or budwood early in the day while temperatures are cool and the plants are still fully turgid. The best vegetative buds usually come from the inside canopy of the tree on the current season’s growth. Mature buds are most desirable; discard terminal and younger buds because they are often not mature. To keep budwood from drying out, getting hot, or freezing (depending on the season), place it into plastic bags or wrap it in moist burlap as it is collected. Then move to a shaded or sheltered area to prepare the buds. Place budwood of only one variety in each labeled bag.
Budsticks are usually prepared in a cool, shaded area. Remove the leaves but keep the petioles (leaf stem) intact to serve as handles when inserting a bud into the rootstock. Then cut the sticks to a convenient length, leaving three to six buds per stick. Budsticks that will not be used immediately should be bundled, labeled, and stored in moisture-retaining containers such as plastic bags or waxed cardboard boxes and kept cool (32 to 45°F). The longer budwood is stored, the less likely it is to “take.” Generally, budwood stored for more than a few days should be discarded.
When budwood is taken to the field, equal precautions against drying should be taken. Storing budwood in a picnic cooler with ice will help keep it cool and moist. Individual bundles of scions carried by budders are often wrapped in moist burlap or kept in dark (not clear) plastic.
Budding Techniques
T-Budding
T-budding is most commonly used for summer budding of apples, crabapples, dogwoods, peaches, and pears. T-budding must be one when the bark will “slip.” Slipping means that, when cut, the bark easily lifts or peels in one uniform layer from the underlying wood without tearing. The exact time when this condition occurs depends on soil moisture, temperature, and time of year. It varies with species and variety. Dry or excessively hot or cold weather can shorten the period when bark slips. Irrigation can be valuable in extending the T-budding season.
Since budding is usually done during the warm summer months, two other precautions are commonly taken to ensure success. First, buds should not be added when the air temperature exceeds 90°F. Second, buds should be inserted on the cooler north or east sides of stems.
Preparing the Stock [click image to enlarge]

Budding knives usually have a curved tip (Figure 10), making it easier
to cut a T-shaped slit. First, insert the point of the knife and use a
single motion to cut the top of the T. Then without removing the point
of the knife, twist it perpendicularly to the original cut and rock the
blade horizontally down the stem to make the vertical slit of the T. If
bark is slipping properly, a slight twist of the knife at the end of
this cut will pop open the flaps of the cut and make it easier to insert
the bud. In practice, the top of the T is usually slanted slightly
(Figure 11).
This same type of cut can be made using two separate strokes, one vertical and one horizontal, and then using the back of the budding knife tip to pry up the flaps slightly. Although much slower, this technique may be easier.
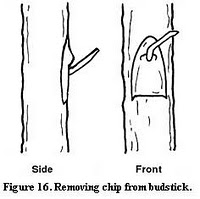
Removing Buds from the Budstick [click image to enlarge]

The bud to be inserted is often just a shield of bark with a bud
attached or a very thin layer of wood with both the bark shield and bud
attached (Figure 12). Various techniques can be used to make these cuts,
but the shape of the cut remains the same.
Begin the first scion cut about 1/2 inch below the bud and draw the knife upward just under the bark to a point at least 1/4 inch above the bud. Grasp the petiole from the detached leaf between the thumb and forefinger of the free hand. Make the second cut by rotating the knife blade straight across the horizontal axis of the budstick and about 1/4 inch above the desired bud. This cut should be deep enough to remove the bud, its shield of bark, and a thin sliver of wood.
A variation often used with dogwood is to slant the first upward cut so that it goes about halfway through the budstick. Then make the top cut and bend the budstick by applying gentle but constant finger pressure behind the bud. The bark should lift and peel off to the side, yielding bark and bud but no wood.
Caution: Straight lifting rather than the sideward motion will separate the bud from the bark rather than keeping it intact. Shields removed this way are useless!
The cut surface of the rootstock and bud must stay clean. Do not touch these parts with your fingers. Also, do not set buds down or put them in your mouth.